


Torch Fired Crackle Enamel Earrings
- Category: Enamel
- Technique(s): Enamel
- Skill Level: Intermediate
Crackle enamel is a technique that requires the building up of several layers of enamel, including a layer of liquid enamel. The heating of the layer of liquid enamel on top of the powder enamel causes it to crack and form a "crackle glaze" look. It's a very pretty look, and makes for beautiful components in earrings, pendants, and other jewelry.
Special Instructions: *Torches: Several types of torches work well for this project. Among these are propane, oxygen/acetylene and map gas. If you are using a small butane torch, you will want to use a lighter gauge metal (no less than 26g) and create a smaller piece since these torches don't get as hot as the others. While the butane torches may have worked fine when enameling just two or three layers, this piece requires at least five coats of enamel and each successive coat needs a bit more heat to reach maturity. The other butane option would be to use two torches as you heat the piece final coats.
**Please follow appropriate safety precautions. Wear some type mask when sifting enamel and always wear protective eye wear when firing pieces. Additionally, I also wear some type of apron (I'm currently using a leather one from a welding shop.) A trivet or red-hot piece of enamel that falls on your clothes may start a fire (yes, I've burned a hole in my dress before).
Procedure
Enamellists use various methods for applying and firing torch enamel. While the means described herein may differ from what you have learned, I will simply share what works for me. I believe there is no "right" or "wrong" if the method works.
Materials

24 Gauge 0.020 Dead Soft Copper Sheet Metal - 6x6 Inch
MET-705.24
- Lesson Quantity: 1.00 pieces
- Purchase Quantity: 1.00 each
- Price: $10.83
- Gold Club Price: $8.12

Counter enamel
- Lesson Quantity: 1.00 pieces
- Purchase Quantity: 1.00 each
Opaque enamel - 1560 Blue Jay Blue
- Lesson Quantity: 1.00 pieces
- Purchase Quantity: 1.00 each
Clear Crackle Enamel - Transparent 2008 Crackle Base Clear
- Lesson Quantity: 1.00 pieces
- Purchase Quantity: 1.00 each
Dry form liquid enamel – White 533 used here
- Lesson Quantity: 1.00 pieces
- Purchase Quantity: 1.00 each

Sterling Silver Earwires 15mm w/ 1.5mm Bead - Pack of 2
K19-47
- Lesson Quantity: 1.00 pieces
- Purchase Quantity: 1.00 pieces
- Price: $1.26
- Gold Club Price: $0.95
Tools

Metal Cutting Shears
SHR-536.00
- SHR-536.00
- Lesson Quantity: 1.00 pieces
- Purchase Quantity: 1.00 each
- Price: $14.97
- Gold Club Price: $11.23

Euro Punch Plier 1.50mm
PLR-133.70
- PLR-133.70
- Lesson Quantity: 1.00 pieces
- Purchase Quantity: 1.00 each
- Price: $14.97
- Gold Club Price: $11.23

Handy Flame II Propane Torch
SOL-330.00
- SOL-330.00
- Lesson Quantity: 1.00 pieces
- Purchase Quantity: 1.00 each
- Price: $59.95
- Gold Club Price: $44.96

Fire Brick
SOL-485.00
- SOL-485.00
- Lesson Quantity: 1.00 pieces
- Purchase Quantity: 1.00 each
- Price: $15.95
- Gold Club Price: $11.96

Thompson 40 Mesh Sifter Small - Pack of 3
G11-4
- G11-4
- Lesson Quantity: 1.00 pieces
- Purchase Quantity: 1.00 pieces
- Price: $21.85
- Gold Club Price: $16.39
alundum stone
- Lesson Quantity: 1.00 pieces
- Purchase Quantity: 1.00 each

Safety Glasses
G21-1
- G21-1
- Lesson Quantity: 1.00 pieces
- Purchase Quantity: 1.00 pieces
- Price: $2.97
- Gold Club Price: $2.23

Individually Packed Disposable Face Masks - Pack of 50
G21-2
- G21-2
- Lesson Quantity: 1.00 pieces
- Purchase Quantity: 1.00 pieces
- Price: $7.95
- Gold Club Price: $5.96

Thompson 1.25 Inch Trivet - Pack of 3
G11-2
- G11-2
- Lesson Quantity: 1.00 pieces
- Purchase Quantity: 1.00 pieces
- Price: $21.85
- Gold Club Price: $16.39
Instructions
Step 1
These oval disks are 1" x 1.75" .
You can draw them on paper to use as a pattern, or alternatively, draw them right on your metal If you use paper patterns, use two copies of the pattern putting liquid cement on the back of the pattern and on the copper to which you will attach it.
Allow both to dry and then stick them together.
Use metal cutters or a jewelry saw to cut out identical shapes for the earrings.
Pro Tip:


Step 2
Drill or punch a hole in the top of each metal piece.

Step 3
Sand the edges of the pieces and the holes if needed.
At this point, some enamellists scrub the pieces with Penny Brite or another product.
I have not found this necessary.
Debris from the sanding can be wiped off or the pieces can be dipped in water and dried.
At this point, some enamellists scrub the pieces with Penny Brite or another product.
I have not found this necessary.
Debris from the sanding can be wiped off or the pieces can be dipped in water and dried.

Step 4
Give each earring a gentle convex curve with your hands or a pair of pliers.
In my opinion, a slight curve helps the crackle do its work and makes the pieces a bit stronger.
In my opinion, a slight curve helps the crackle do its work and makes the pieces a bit stronger.

Step 5
Complete each step on both earrings throughout this process even though the photos only show one piece.
Put on your protective mask and counter enamel the back sides of the earrings.
Place a piece of paper or magazine page on the work surface to catch excess sifted enamel so you can put it back in the enamel jar.
I balance each piece on my finger over the jar of enamel and sift counter enamel on the back, starting at the outer edge and working toward the middle.
Since these pieces are slightly bent and the enamel may want to slide down the edges, manipulate them while sifting so that the part of the piece you are trying to sift on to is relatively flat.
You will be changing this position as you sift.

Step 6
Carefully place the piece on a trivet.

Step 7
Put on your safety glasses.
Place the trivet on the corner of the fire brick so that as much of the piece as possible is exposed off the brick.
Torch fire the piece from underneath until the entire piece has a reddish glow and is glossy.
Try to keep the flame as close to perpendicular to the piece as possible to achieve the best heat.
Gently move the flame back and forth under the piece as you heat the entire earring.
Repeat for the second earring.


Step 8
Use tweezers or jewelry pliers to remove the piece from the trivet and let it cool until you can pick it up and add the second coat of counter enamel.


Step 9
Torch fire the second coat of counter enamel on each earring.

Step 10
Remove the pieces from the trivet and set on a fire proof surface (not on the paper!) to let them cool.

Step 11
Dip the pieces in water and dry them to remove the loose fire scale on the front of the pieces.
Please be sure they have cooled somewhat or they may crack in the water.
Note: The metal will still be discolored, but there is no need to try to sand it back to its original look.
Please be sure they have cooled somewhat or they may crack in the water.
Note: The metal will still be discolored, but there is no need to try to sand it back to its original look.

Step 12
Sift the opaque color onto the front side of the pieces in the same method used for the counter enamel application.


Step 13
Torch fire this coat in a manner similar to that used for the counter enamel.
When I already have counter enamel fired on a piece, I like to gradually heat the piece when adding the front coats.
I start with the torch about 5 inches below the piece and slowly inch it up as the piece gets hot.
In my opinion, this helps preserve the looks of the counter enamel.
I will "sneak up" on the piece with each firing after the second coat of counter enamel.


Step 14
Remove the pieces from the trivets and allow to cool.
If you can still see copper below this coat of opaque, sift and fire another coat before proceeding.
Then sift and fire a fairly thick coat of clear crackle enamel onto the top of the pieces (don't forget to "sneak up" on them)
If you can still see copper below this coat of opaque, sift and fire another coat before proceeding.
Then sift and fire a fairly thick coat of clear crackle enamel onto the top of the pieces (don't forget to "sneak up" on them)

Step 15
Cool the pieces and then apply a very thin layer of white liquid enamel to the tops.
Mix the liquid enamel with distilled water as described in the instructions for this product.
Then add a bit of extra water to create a medium thin enough to roll down the piece.
Put a couple of drops of liquid enamel on the piece and then tap it on the table until it is fairly well covered.
If there are a few places that the liquid enamel doesn't reach, you can dab a tiny drop on these spots, taking care not to make them thick.


Step 16
Before drying, carefully check the back of the pieces for any liquid enamel that escaped onto your counter enamel.
Use a brush dipped in water to remove this.
Use a brush dipped in water to remove this.


Step 17
Either allow the pieces to thoroughly dry or use a heat gun to aid this process.
Protect the surface below the heat gun as some of these guns are strong enough to scorch a surface.
Also, the pieces will become quite hot to the touch; so use tweezers or jewelry pliers to pick up the piece.
Protect the surface below the heat gun as some of these guns are strong enough to scorch a surface.
Also, the pieces will become quite hot to the touch; so use tweezers or jewelry pliers to pick up the piece.


Step 18
"Sneak up" on the pieces and torch fire them.
This will likely require a longer, more intense firing than usual in order for the crackle to get going.
Watch the piece and if you do not see ample cracking, move the torch to the top of the piece and fire a bit from that direction.
Don't stay too long as this tends to gray the piece.
This will likely require a longer, more intense firing than usual in order for the crackle to get going.
Watch the piece and if you do not see ample cracking, move the torch to the top of the piece and fire a bit from that direction.
Don't stay too long as this tends to gray the piece.


Step 19
The liquid enamel should have "cracked" and if it hasn't you likely have not fired it enough.
Also, it will not crack as much if you employed too thick a coat of liquid enamel.
Also, it will not crack as much if you employed too thick a coat of liquid enamel.

Step 20
When the pieces have cooled, check the edges for rough spots.
You may want to remove these using an alundum stone and water or a jewelry file.
You may want to remove these using an alundum stone and water or a jewelry file.

Step 21
Attach the ear wires and your earrings are finished.
Pro Tip: Below are other examples of the use of crackle enamel. You may note some dark spots on the orange pair. These likely occurred as a result of too thin a coat of the opaque Pumpkin Orange (1850) and it may have needed a second coat. It is also possible that I fired the pieces from the top for too long. I used the white liquid enamel over the crackle on this pair. The green pair was made with opaque Mistletoe Green (1380) and yellow liquid enamel (769). The blue diamond shaped earrings were made with the same BlueJay Blue as in the tutorial and a teal liquid enamel (935). You can see that the contrast of these two colors is subtler than the pair in the tutorial on which I used white liquid enamel.


Supply Detail
loading...
Change Metal:
This Pattern requires:
Purchase quantity:
Price: $
Gold Club Price: $
Purchase quantity:
Price: $
Gold Club Price: $
Karen Meador, Ph.D.
Other Patterns by Karen Meador, Ph.D.
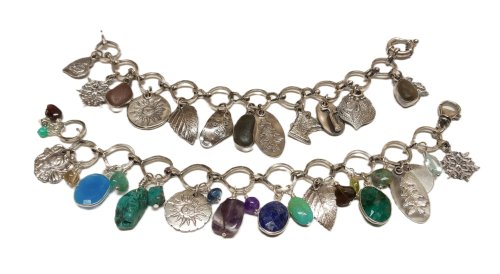
 Smile Cluster Necklace
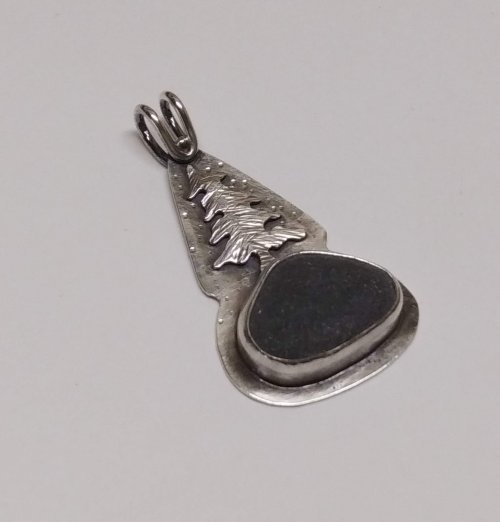
 Stone Twist Wrap
 Loopy Loo Graduated Wire Bracelet
 Torch Fired Separation Enamel
 Link-it Necklace
 Taco Earrings
 Dimensional Wire Cuff
 Torch Enameling with Opaque Enamels
 Crackle Enamel and Sgraffito Pendant
 Torch Enameled Stencil Earrings
 Criss Cross Wire Wrap
 Torch Fired Sgraffito Earrings
 Pattern Wire Earrings
 Mesh Stenciled Enamel Necklace
 Infinity Link Bracelet
 Ellipse Earrings
 Geometric Earrings
 Treble Clef Earrings
 Boho Bangle
 Wire Roses Bracelet
 Hammered Chaos Necklace
 Layered Torch Enameled Earrinngs
 Hammered Chaos Earrings
![]()
The premier place for all your jewelry making needs. The best in wire, tools, cabochons, gemstone beads and more. As well as a superior resource for educational support to help build your jewelry making skills and techniques.
Connect With Us

® 2007 - 2026 Wirejewelry.com Powered by ClaimTheWeb Cart