- Wire
- Sheet
- Tools
- DVDs
- Streaming Video
-
Beads
- Handmade Venetian Glass Beads
-
Shop by Gemstone
- Agate - Blue Crazy Lace
- Agate - Blue Lace
- Agate - New Brazilian
- Agate - Pink Crazy Lace
- Agate - Purple Crazy Lace
- Agate - Rainforest
- Agate - Turritella
- Amethyst
- Amethyst - Dog Teeth
- Apatite - Blue
- Bronzite
- Carnelian
- Carnelian - Matte
- Cat's Eye
- Chrysocolla
- Dumortierite
- Dumortierite - Purple
- Goldstone - Blue
- Goldstone - Brown
- Goldstone - Green
- Hematite
- Jade
- Jade - New Burma
- Jade - West African
- Jade - Yellow
- Jasper - Apple
- Jasper - Black Silver Leaf
- Jasper - Dragons Blood
- Jasper - Green Brecciated
- Jasper - Imperial
- Jasper - Iron Zebra
- Jasper - Mexican Red Snowflake
- Jasper - Noreena
- Jasper - Picasso
- Jasper - Picture
- Jasper - Porcelain
- Jasper - Red Creek
- Jasper - Red Creek - Matte
- Jasper - Red Porcelain
- Jasper - Venus
- Jasper - White Lace Red
- Jasper - Wildhorse
- Labradorite
- Lapis
- Malachite
- Obsidian - Golden
- Obsidian - Snowflake
- Onyx
- Onyx - Matte
- Orange Sodalite
- Prehnite
- Pyrite
- Quartz - Blue Green
- Quartz - Cherry
- Quartz - Rose
- Quartz - Smoky
- Rhyolite
- Rhyolite - Bird's Eye
- Sardonyx
- Seraphinite
- Sodalite
- Tiger Eye
- Tiger Eye - Blue
- Tiger Eye - Red
- Turquoise - African
- Turquoise - Yellow
- Pearls
- Swarovski Crystal Beads

- Stones & Supplies
- On Sale Now


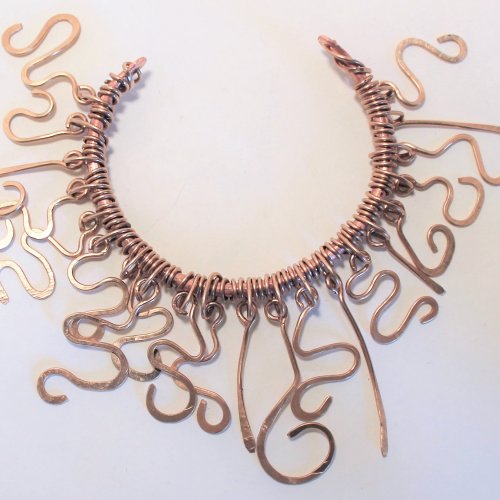


Climbing Roses Bangle
- Category: Contemporary
- Technique(s): Making Loops, Making Spirals
- Skill Level: Intermediate
What could be more fun than making an elegant, undulating bangle of steel wire and
creating a fantasia of beautiful flowers to adorn it! These colorful climbing roses will
look lovely on your wrist as they wind along their steel trellis.
creating a fantasia of beautiful flowers to adorn it! These colorful climbing roses will
look lovely on your wrist as they wind along their steel trellis.
Materials

16g annealed steel wire
- Lesson Quantity: 35.00 inches
- Purchase Quantity: 35.00 each
Premo Sculpey Polymer Clay
- Lesson Quantity: 7.00 pieces
- Purchase Quantity: 1.00 each
Liquid Sculpey Transfer Medium
- Lesson Quantity: 1.00 pieces
- Purchase Quantity: 1.00 each
Pearlescent powder (a smidge to highlight the polymer clay – your choice of color)
- Lesson Quantity: 1.00 pieces
- Purchase Quantity: 1.00 each
Tools

C.H.P Milano Small Sprue Cutter, 6-1/4 Inches, Flush Cut
PLR-488.00
- PLR-488.00
- Lesson Quantity: 1.00 pieces
- Purchase Quantity: 1.00 each
- Price: $22.97
- Gold Club Price: $17.23

Acculoop Precision Round Nose
PLR-741.00
- PLR-741.00
- Lesson Quantity: 1.00 pieces
- Purchase Quantity: 1.00 each
- Price: $18.97
- Gold Club Price: $14.23

5 1/4 Inch Brass Lined Flat Nose Plier - Pack of 1
G2-78
- G2-78
- Lesson Quantity: 1.00 pieces
- Purchase Quantity: 1.00 each
- Price: $14.57
- Gold Club Price: $10.93
wire jig
- Lesson Quantity: 1.00 pieces
- Purchase Quantity: 1.00 each

Steel Bracelet Mandrels - Round
MAN-216.00
- MAN-216.00
- Lesson Quantity: 1.00 pieces
- Purchase Quantity: 1.00 each
- Price: $37.97
- Gold Club Price: $28.48

9 Inch Brass Hammer with Wooden Handle
G3-20
- G3-20
- Lesson Quantity: 1.00 pieces
- Purchase Quantity: 1.00 each
- Price: $6.97
- Gold Club Price: $5.23

Large Horn Anvil
ANV-222.00
- ANV-222.00
- Lesson Quantity: 1.00 pieces
- Purchase Quantity: 1.00 each
- Price: $48.57
- Gold Club Price: $36.43

Cross Lock Curved Tweezers
TWZ-741.00
- TWZ-741.00
- Lesson Quantity: 1.00 pieces
- Purchase Quantity: 1.00 each
- Price: $3.97
- Gold Club Price: $2.98
Clay tools
- Lesson Quantity: 1.00 pieces
- Purchase Quantity: 1.00 each
Instructions
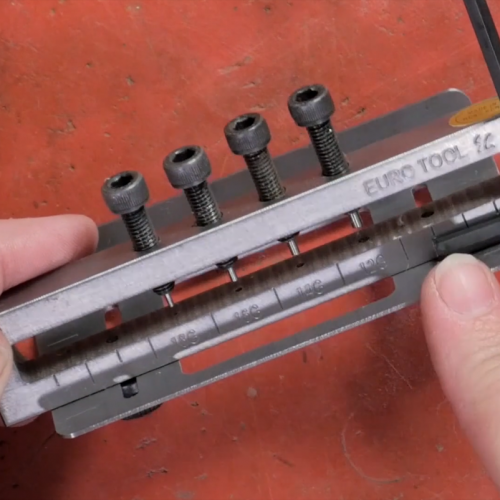
Step 1
Pro Tip: It is highly recommended that you read through the tutorial before beginning this project.
Arrange pegs on your jig placing a ½" diameter peg at top center. Arrange 1/16" pegs in a staggered pattern down the center lengthwise separating them about ½" from each other in length and width as shown in the photo. Using heavy-duty wire cutter, cut a 35" length of steel wire from the spool. Bend the wire in half around the top peg so the center of the wire forms a U-shape. Cross the wires under the peg once.

Step 2
Remove the wire from the peg, hold the loop with your flat-nose pliers and twist the loop the wire once to secure.

Step 3
Place the twisted portion of the loop above the top ½" round peg and twist the wire four times more to make the loop smaller in size. Wrap one wire counter-clockwise around the closest 1/16" peg. Making certain that the top loop remains centered; wrap the other wire clockwise around the adjacent peg and it. Wrap the wire at the right side clockwise around the third peg. Wrap the wire at the left side counter-clock wise around the fourth peg. Wrap the wire at the right side counter-clockwise around the
fifth peg. Do likewise with the left wire around the sixth peg. Wrap the wire at the right side clockwise around the seventh peg. Do likewise with the wire at the left side around the eighth peg. Finish by wrapping the wire at the right side clockwise around the ninth peg.
fifth peg. Do likewise with the left wire around the sixth peg. Wrap the wire at the right side clockwise around the seventh peg. Do likewise with the wire at the left side around the eighth peg. Finish by wrapping the wire at the right side clockwise around the ninth peg.

Step 4
Grasp both wires directly below the last peg at the bottom of the jig and twist the wires several times to secure.

Step 5
Wrap your work around a steel bracelet mandrel or a round puck. Check the size by trying the bangle on your wrist. Continue adjusting the size of your work if it is too small or too large. Note: you will be adding about one inch more length to the bangle when you make the clasp in Steps 6 through 11 so take this into account when measuring.

Step 6
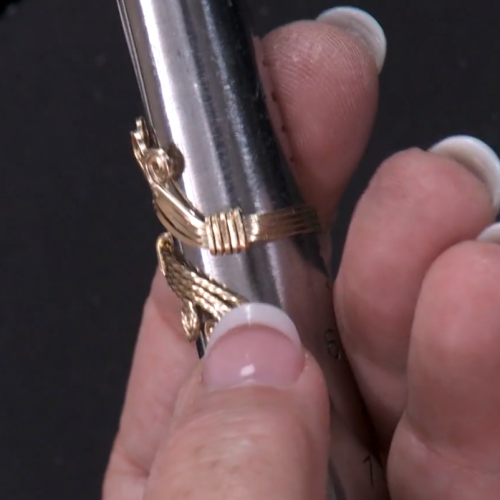
Coil one loose wire end on top of the twisted end by grasping the end in your flat-nose pliers and wrapping five to six times leaving about 1 ½" of remaining wire.

Step 7
Grasp the end of the wire in your round-nose pliers and create a small loop.

Step 8
Make a loose open coil with the wire so it lies closer to the bangle, projecting about ½" out from the coil.

Step 9
Loosely coil the other wire closely to the coil by wrapping several times around your round-nose pliers.

Step 10
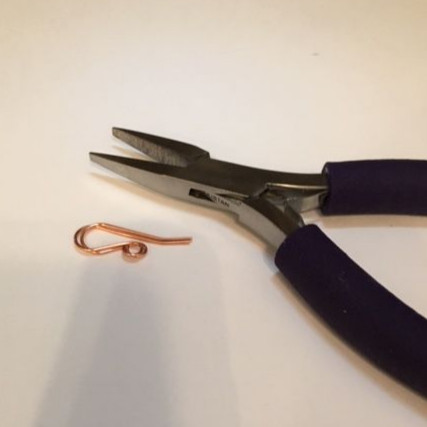
Using round-nose forming pliers or a ¼" width peg, wrap the wire immediately following the coil and form a small U-shaped hook. Leave a 1 cm (about ½") tail and clip off the excess wire. File smooth any sharp edges at the end of the wire.

Step 11
Using your round-nose pliers, make a tiny loop at the very end of the wire so it rolls back on itself and nests against the hook. Hammer the loop so it flattens slightly.

Step 12
Work-harden and texture the bangle by placing it on an anvil or steel bracelet mandrel and striking it with a hammer. Use the flat end of the hammer to flatten the wire somewhat and further form the round shape of the bangle. Use the narrow end of the hammer to add small textural dents in the wire surface.

Step 13:
Creating the Roses
Condition your polymer clay using a roller or pasta machine. If mixing colors, roll until they are well blended. Assemble cutting tools, premade molds, canapé cutters, and texture sheets on your work
surface.
surface.

Step 14
Roll a small amount of polymer clay into a pea-sized ball and push up through a loop so a tiny knob forms inside the top of the loop and a larger amount lies beneath the loop. Flatten the bottom portion and trim off any excess that extends more than 1mm - 2mm beyond the wire. Using a needle tool or fine ball-tipped tool, make six impressions in the top portion of the polymer clay.

Step 15
Roll chartreuse or green polymer clay to a thickness of about 2mm (between 1/32" and 1/16"). Slice off a 2mm strip from the clay and roll into a snake that is approximately 2mm in thickness. Cut the snake into approximately 5mm lengths. Roll a 5mm long section so it tapers at one end and is blunt at the opposite end. Make a small divot in the top of the thick end of the clay. Dip the pointed tip into Liquid Sculpey Transfer Medium and insert into one of the holes. Repeat until all six holes are
filled.
filled.

Step 16
Create tiny petals with teardrop or round shaped cutter. Hold the punched out clay between your thumb and index finger of your non-dominant hand and squeeze until the clay flattens a bit. Using the thumb and index finger of your dominant hand, squeeze a tail at one end so the petal has a tapered shape if your clay shape is round. Use a needle tool to impress a line down the center of the petal. Apply the petal at a 45-degree angle to the flower base with the widest portion of the petal at the
top. Create more petals and encircle the base.
top. Create more petals and encircle the base.

Step 17
Repeat Step 16 using a contrasting color of polymer clay to build another layer around the previous petals.

Step 18
Cover the bottom of the metal loop and lower flower base with leaf-shaped cutouts. If you don't have a cutter in the shape I used in this photo, cut out three separate teardrop shapes joining the widest portions of the leaves at the lower base.

Step 19
Make tiny cone shapes as you did in Step 15. Nestle these on the flower body between the large leaf shapes.

Step 20
Cut out a small star (about 10mm in size) and texture with
small divots using a fine ball-tipped tool. Apply a bit of Liquid Sculpey
Transfer Medium to the underneath side of the star. Affix the star to the center of the leaves at the lower flower base. Secure it by pressing more divots along the outside edges of the star. Your flower is now completed...if you aren't pleased with the finished flower, ball up your clay and start over...it took several attempts before I was satisfied with mine!

Step 21
Using a soft bristle artist's paintbrush, lightly dust a bit of pearlescent powder on the entire flower. Note: go lightly...using too much pearlescent powder will obscure the colors!

Step 22:
Bake the flowers
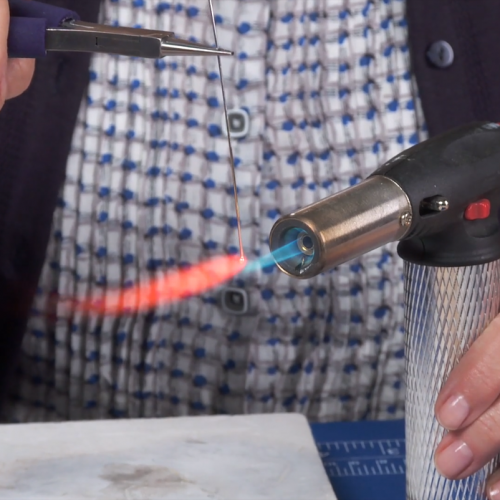
Bake the Flower: before proceeding with the next flower, grasp your bangle in locking tweezers and bake according to the clay manufacturer's directions.
Note: you can bake Polymer clay multiple times as long as you bake at the correct temperature for the clay type you are using! Premo! clay bakes at 275 degrees for 20 - 30 minutes per ¼" thickness of clay...if using a different brand of clay, temperature and time required to bake the clay may differ! Double check your oven's temperature with a stove thermometer to make sure you have the correct temperature for the brand of clay you are using!
Note: you can bake Polymer clay multiple times as long as you bake at the correct temperature for the clay type you are using! Premo! clay bakes at 275 degrees for 20 - 30 minutes per ¼" thickness of clay...if using a different brand of clay, temperature and time required to bake the clay may differ! Double check your oven's temperature with a stove thermometer to make sure you have the correct temperature for the brand of clay you are using!
After you have baked a flower, follow Steps 14 through 21 to create four more flowers staggering them from one side of the bangle to the other and make a fifth flower on the free end of the coiled wire near the clasp (as shown in the photo). Switch out color combinations. Be as creative as you
want! Hint: Premo! clay is somewhat flexible...if you'd like it to be more ridged, I find that submerging the clay in ice water when the clay is still hot from baking helps to accomplish this! Leave a free loop here and there as part of the overall design. If you're pleased with your bangle as is, put it on,
wear it, and show it off!

Supply Detail
loading...
Change Metal:
This Pattern requires:
Purchase quantity:
Price: $
Gold Club Price: $
Purchase quantity:
Price: $
Gold Club Price: $
Barbara Briggs
Other Patterns by Barbara Briggs
 Anemone on Coral Wire and Polymer Ring
![]()
The premier place for all your jewelry making needs. The best in wire, tools, cabochons, gemstone beads and more. As well as a superior resource for educational support to help build your jewelry making skills and techniques.
Connect With Us


® 2007 - 2026 JewelryMaking.com Powered by ClaimTheWeb Cart